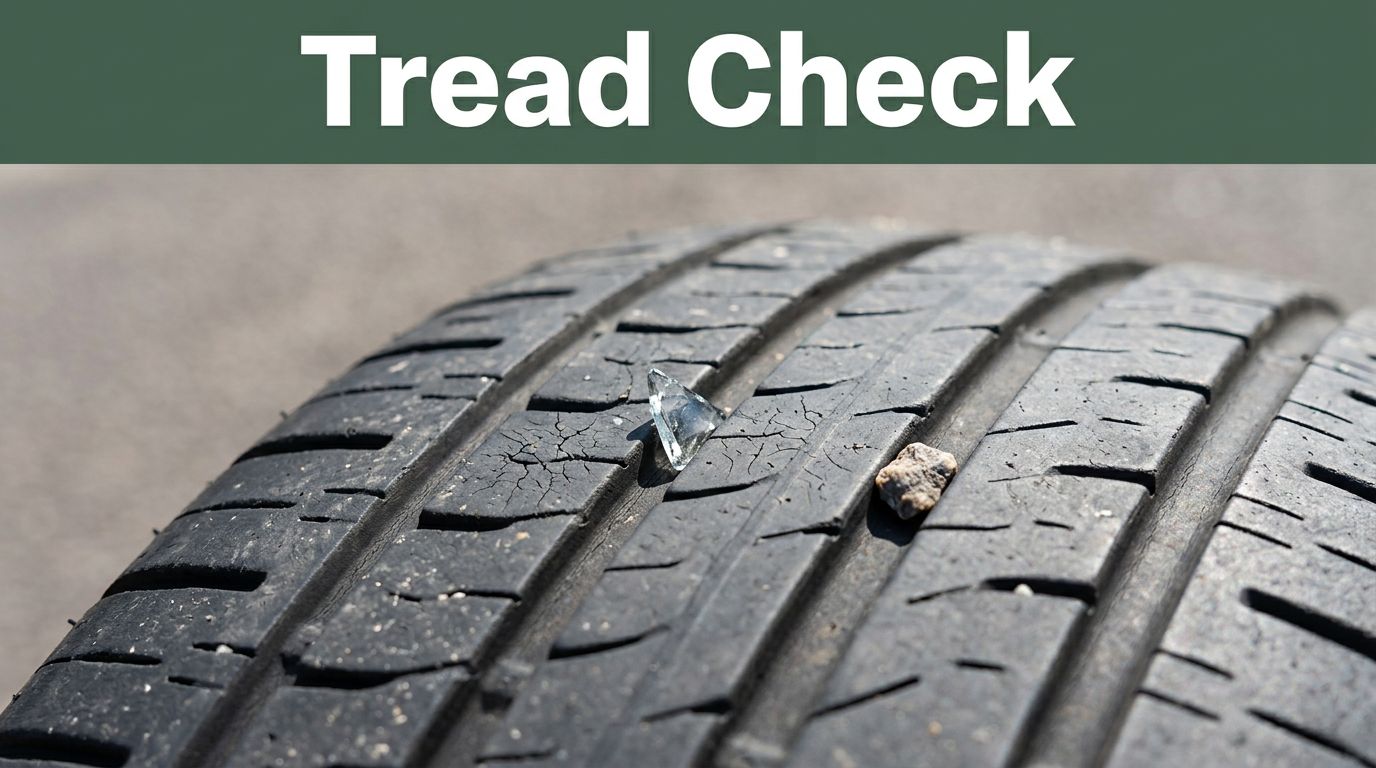
Picture this. You’re cruising down the highway when a shard of glass slices into your tire tread. It holds for a bit. Then it blows out. Luckily, one driver spotted it early during a quick check and avoided disaster. Tire issues like these cause over 11,000 crashes each year, per NHTSA data.
Embedded glass means sharp shards stuck in the rubber from road debris. Flints are small, pointy rocks that pierce treads. Dry rot shows as cracks from age, sun, and weather. These problems sneak up fast. You can catch them with a simple home inspection.
This guide walks you through steps anyone can do. You’ll learn to spot dangers, remove threats, and prevent failures. Stay safe, skip the tow truck, and save cash.
Why Inspecting Tire Treads Keeps You Safe and Saves Cash
Tire problems don’t wait for warnings. A small glass piece can turn a smooth drive into a roadside nightmare. Inspecting treads stops flats before they happen. You avoid swerving on busy roads.
Debris litters highways. Broken bottles leave glass shards. Gravel roads spit out flints. These embeds weaken rubber over time. Dry rot creeps in from UV rays and ozone. Tires over five years old suffer most. Cracks spread without notice.
Check monthly. Do it after potholes or curbs. Always inspect before long trips. Five minutes prevents hours of hassle. One friend hit debris on a road trip. He checked tires that night. No blowout the next day.
Regular looks extend tire life. New tires cost hundreds. Repairs add up too. Safe drivers save by catching issues early. You dodge tow fees, which average $100 or more. Plus, you keep control in rain or snow.
Neglect leads to uneven wear. That shortens life further. Drivers who skip checks face surprises. Motivated yet? Next, gather tools for the job.
Gear Up with Simple Tools and Smart Safety Steps
Start with basics. Grab a bright flashlight from any auto store. Sturdy gloves protect your hands. Needle-nose pliers or tweezers pull out embeds. A tread depth gauge measures wear. Add a tire pressure gauge. Wheel chocks keep things steady.
These cost under $30 total. Find them at Walmart or Amazon. No fancy gear needed.
Safety comes first. Park on flat ground. Engage the parking brake. Chock rear wheels if on a slope. Let tires cool after driving. Hot rubber hides issues.
Work one tire at a time. Most checks happen on the ground. Jack up for a closer look if you want. But ground level works fine for beginners. Clean your hands. Use good light, even at noon.
Gloves prevent cuts from sharps. Flashlight reveals hides. Pressure gauge spots underinflation, which worsens rot. Ready to scan? Focus on glass and flints next.
Spot and Remove Glass and Flints from Your Treads
Glass and flints hide in grooves. They puncture slow or fast. Clean the tire first with a rag. Dirt masks problems.
Shine light smartly. Rotate the wheel by hand. Check every inch.
Visual Scan Tricks That Reveal Hidden Sharps
Angle your flashlight at 45 degrees. Sweep it across tread blocks. Light catches shiny glass edges. Flints show as dull gray spots.
Rotate the tire slowly. Look from top, side, and bottom. Grooves trap most debris. Wet the tread lightly. Water makes embeds pop out.
Glass sparkles like diamonds. Flints blend but feel off. Snap photos before and after. Rushing misses half the threats. Take your time here.
Shadows in grooves signal trouble. Check all four tires the same way. One overlooked shard ruins your day.
Hands-On Feel and Safe Digging
Put on gloves. Run a flat hand over treads. Feel for bumps or sharp edges.
Press gently into grooves. Your fingers sense what eyes miss. Glass feels smooth yet cuts. Flints stay rough and pointed.
Probe suspects with pliers. Don’t dig blind. Bare hands risk injury. Stay calm. Patience pays off.
Combine touch with sight. A bump plus shine means action. This step confirms visuals.
Pull Them Out Without Hurting Your Tire
Grip the base with pliers. Wiggle straight out. Never twist. Twisting tears rubber.
Clean the hole after. Use a soft brush or compressed air. Check for more pieces nearby.
Inspect the spot. Small damage heals with driving. Deep cuts need pros. Pat yourself on the back. You just saved a tire.
Catch Dry Rot Before Your Tires Crack and Fail
Dry rot differs from punctures. UV rays bake rubber stiff. Heat and age crack it open. Sidewalls show first. Treads follow.
Check tires over five years old often. Old rubber fails sudden.
Check Sidewalls for Tiny Cracks and Cuts
Squeeze the sidewall. Feel for brittleness. Good rubber flexes. Rotten feels dry and hard.
Look close for spiderweb cracks. Turn the wheel to see inner sides. Curbs cause cuts too. These mimic rot.
Tiny lines grow fast. Catch them early. Flex test confirms doubt.
Test Treads for Wear and Depth Issues
Do the penny test. Insert a penny upside down in a groove. Lincoln’s head visible? Treads too thin.
Look for bulges or uneven spots. These hide inner rot. Check pressure too. Low air speeds wear.
Combine tests. Depth under 2/32 inch spells replacement. Rot pairs with shallow treads often.
Fix Problems Fast and Prevent New Ones
Small punctures? Use a plug kit for DIY. No sidewall hits though. Rotate tires every 6,000 miles. Even wear fights rot.
Call pros for deep embeds. Dry rot signs mean new tires. Uneven wear signals alignment issues.
Prevent with shade. Park in garages. Use tire covers in sun. Check pressure weekly. Skip overloads.
Replace if cracks go deep. Treads below 2/32 inch fail. Age over six years? Time’s up.
Schedule monthly checks. After rough roads too. This habit keeps you rolling.
Spotting glass, flints, and dry rot takes minutes. Use your tools right. Safety follows.
Grab that flashlight this weekend. Inspect all four tires. Share this with friends who drive a lot. What’s your worst tire story? Drop it in comments.
Safer roads start with you. Drive confident.