Picture this: you’re cruising down a trail, sun high, legs pumping. Then gears slip mid-climb. You grind to a halt, frustrated. A frayed shifter cable caused it. These cables pull your derailleurs to switch gears. The housing around them shields from dirt and weather.
Shops charge over $100 for this fix. You can do it at home for under $20. It takes about 45 minutes. You’ll save cash and gain skills. This guide walks you through spotting problems, gathering tools, swapping parts step by step, and testing. Follow along. You’ll ride with crisp shifts again.
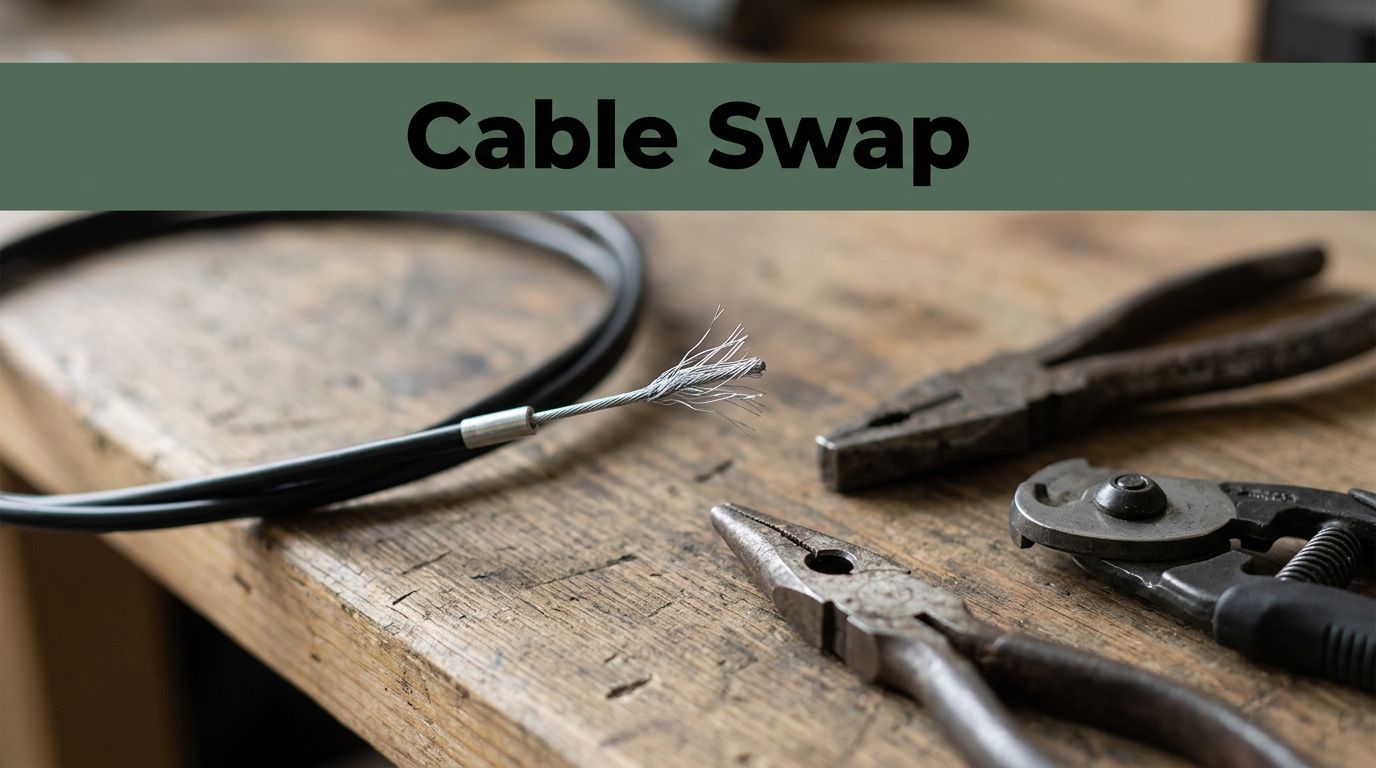
Spot the Warning Signs Your Shifter Cable is Shot
Dirt and rain wear cables fast. Tight turns add stress. Soon, shifts turn sloppy. You notice it on casual rides.
Gears hesitate. They skip cogs. Or they feel mushy, like pushing through sand. Pedaling brings clicking noises. That’s the cable fraying inside.
Look closer. Frayed ends poke out at shifters or derailleurs. Housing cracks or binds. It sticks in spots.
Ignore these? Gears lock up. You crash. Or you strand yourself miles out.
Check now. Inspect at shifters and derailleur. Shift through gears by hand. Feel for grit.
Replace cable and housing together. New cable binds in old housing. That means repeat work soon.
- Hesitant or skipping gears during shifts
- Visible fraying or wires poking from ends
- Mushy, gritty feel when shifting
- Clicking sounds while pedaling
- Cracked or binding housing
Spot one sign? Act fast. Your next ride stays smooth.
Gear Up Right: Tools, Parts, and Safety Musts
Grab the right stuff first. It makes the job easy. Total cost stays under $15 online.
You need these tools:
- Cable cutters for clean snips
- 4mm and 5mm Allen keys for bolts
- Pliers to grip ends
- Rag and bike lube for cleanup
- Zip ties for strain relief
Parts match your bike. Road or MTB? Get 1.2mm diameter shifter cable. Housing: 4mm outer with 1.5mm liner. Add ferrules for ends.
| Item | Purpose | Notes |
|---|---|---|
| Shifter cable | Pulls derailleurs | 1.2mm steel, match length |
| Housing | Protects cable | 4mm outer, buy extra |
| Ferrules | Seals housing ends | Brass or plastic, pack of 10 |
| Cable caps | Crimps cable end | Prevents fraying |
Safety matters. Flip your bike upside down on a soft rag. Or use a repair stand. Wear gloves. Frayed ends cut skin. Work in bright light. E-bikes? Disconnect the battery first.
Match old parts. Pull one out to measure. Perfect fit means no headaches later.
Prep like this. You finish confident.
Nail the Swap: Step-by-Step Shifter Cable Replacement
Shift to the smallest rear cog first. That slackens tension. Lube cable ends but not the last six inches. Work rear derailleur. Repeat for front if needed. Patience wins here.
Step 1: Flip the Bike and Release Cable Tension
Turn your bike upside down. Rest it on the seat and bars. Soft surface prevents scratches.
Shift to smallest rear cog. Loosen the barrel adjuster at the shifter. Turn it out fully.
Grab a 5mm Allen key. Loosen the derailleur pinch bolt counterclockwise. Pull slack from the cable.
Mark housing spots with tape. That helps reinstall exactly. Tension gone? No snaps happen.
Step 2: Pull the Old Cable Free from Shifter and Frame
Twist off grips or pop shifter hoods. Release the lever mechanism inside. Slide the cable out.
Trace along the frame. Pop it from guides and stops. At the derailleur, unclamp fully. Yank the cable free.
Note its length. Dispose of it safely. Watch housing stops. They pop off sometimes.
Old parts out means room for new ones.
Step 3: Cut and Install Fresh Housing
Measure old housing. Cut new pieces to match. Use cable cutters for straight edges.
Slide ferrules on ends. Lube the inside lightly. Snap housing into frame stops.
Feed into shifter and derailleur ports. Check for kinks. Test full travel by hand.
Steady hands work. No tool? Cut slow and check often.
Step 4: Thread and Clamp the New Cable
Lube the cable. Insert into shifter barrel first. Feed through housing to derailleur.
Pull taut by hand. Clamp at pinch bolt loosely. Tighten with 5mm Allen key.
Add a zip tie where cable enters frame. Trim excess at shifter. Crimp a cap on the end.
Taut cable shifts crisp.
Step 5: Reinstall Shifter and Initial Adjustments
Snap grips or hoods back on. Reset barrel adjuster halfway.
Shift through gears by hand. Feel smooth pull. Tighten all bolts. Wipe lube off.
Done with one side? Repeat for the other.
Test for Perfection: Smooth Shifts and Easy Fixes
Spin pedals by hand. Shift all gears. Listen for clean clicks. No chain rub or skips.
Take a short road test. Note issues. Hesitant shifts? Turn barrel adjuster out a quarter turn.
Overshift? Turn it in. Sticky feel means re-lube. Check hanger alignment. Bent? See a pro.
Shifter worn? Replace it. Clean cables monthly. Store bike dry.
Every 500 miles, inspect. That keeps problems away.
You nailed it. Crisp gears return. Rides feel new.
Replacing your frayed shifter cable and housing saves money and boosts pride. You fixed it yourself in under an hour.
Grab tools next time you spot signs. Test on your next spin.
Share your story in comments. What tripped you up? Ride on with confidence.