Picture this. You’re halfway through a long ride when your chain starts skipping under pressure. Gears grind, and you coast to a stop, frustrated. That snap often comes from chain stretch, but it isn’t the metal stretching like a rubber band. Wear on the internal pins slowly elongates the chain over thousands of miles.
This issue sneaks up on riders. It speeds up damage to your cassette and chainrings, leading to costly repairs. You can prevent it with simple checks using a ruler from your kitchen drawer or a $15 wear tool. Both methods take minutes at home. No shop visit needed. In this guide, you’ll learn to spot early signs, measure precisely, and know when to replace. Keep your bike smooth and reliable.
Spot the Signs of Chain Stretch Early
Chain stretch builds from pin wear inside each link. After 2,000 to 5,000 miles, depending on conditions, the chain grows 0.5% to 1% longer. This mismatch throws off your drivetrain timing.
Riders notice symptoms first. Gears skip when you push hard on climbs. Noisy chains rattle during sprints. Shifting feels sluggish or imprecise. These clues mean trouble brews.
Unchecked stretch grinds down sprockets fast. Your cassette teeth hook like shark fins. Chainrings wear thin. A $30 chain fix beats $150 for new gears. Check every 500 to 1,000 miles. Heavy commuters inspect monthly. Pros do it before every race to dodge mid-pack failures.
Think of it like a loose belt on old jeans. It slips at first, then frays everything nearby. Catch it early, and you ride worry-free.
Visual and Feel Checks Before Measuring
Start without tools. Flex the chain off the bike. Stiff links resist bending smoothly. They signal rust or debris inside.
Rust spots or thick grime hide real wear. Wipe it down first. Then push and pull the chain sideways on the cassette. Excess play wiggles more than a fresh chain.
These quick tests flag issues. They guide you to measure next. Always do them before grabbing a ruler.

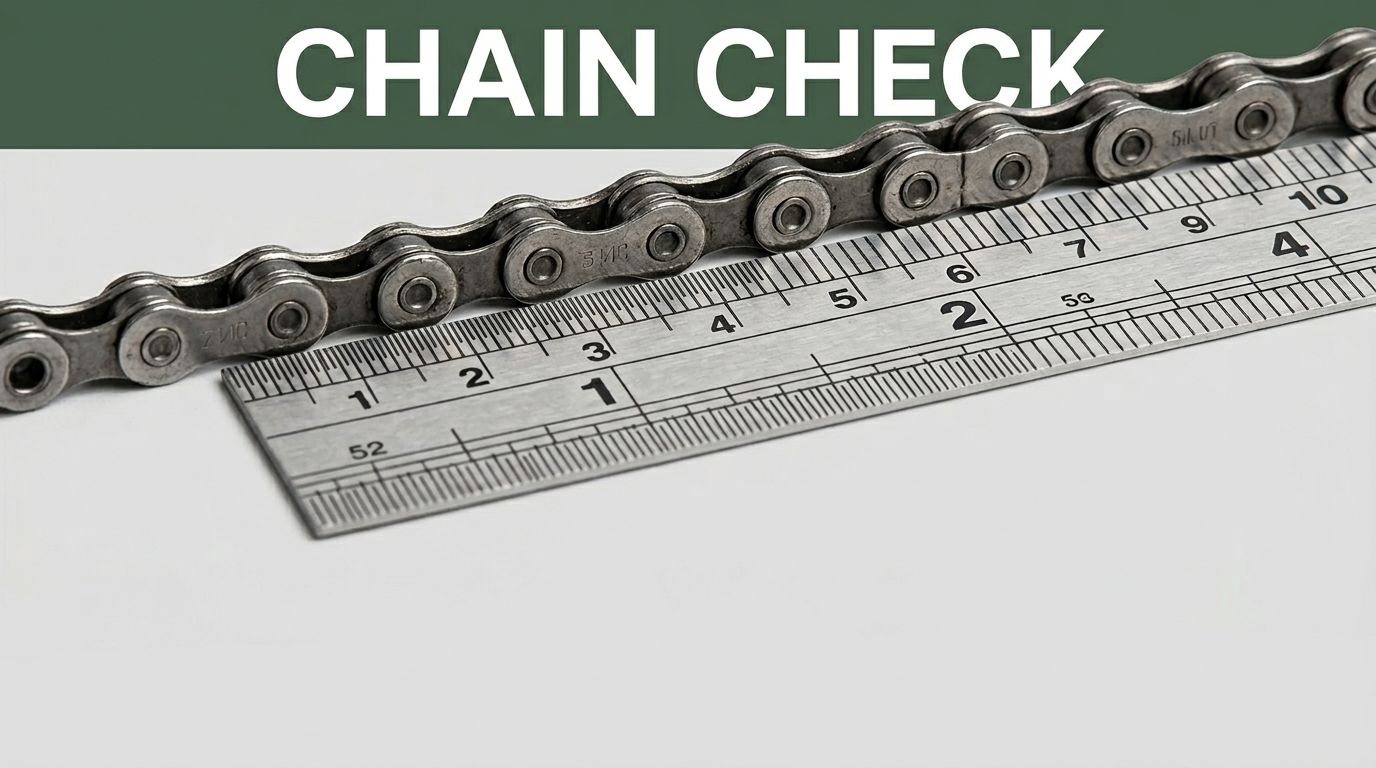
Measure Chain Wear the Simple Way with a Ruler
Grab a clean ruler marked in inches or millimeters. You’ll need degreaser and a rag too. Put your bike on a stand for steady access. Clean and dry the chain completely. Wet links skew results.
This free method suits most casual riders. It catches wear at 0.75% elongation reliably. Lay the ruler flat along the outer plates. Precision matters here.
Step-by-Step Ruler Measurement Process
Follow these steps for accuracy.
- Clean the chain with degreaser. Wipe until shine returns.
- Pick 12 full links. Start at an inner link plate for consistency.
- Align the ruler. Measure from pin center to pin center exactly.
- Read the length. Repeat in three spots.
Use this table for quick reference:
| Links Measured | Measurement (inches) | Chain Status |
|---|---|---|
| 12 | 12.000 – 12.064 | Good |
| 12 | 12.065 – 12.083 | Monitor closely |
| 12 | Over 12.084 | Replace now |
Exact 12 inches means you’re safe. At 12 1/16 inch, watch it close. Over 12 1/8 inch demands a new chain. Average the spots for truth.
Common Mistakes and How to Fix Them
Dirt fools you most. Always degrease first. Counting wrong links throws off numbers. Double-check inner to inner.
Poor light hides pins. Use a bright lamp. Shaky hands miss centers. Steady the bike. If one spot reads high, measure again there. Patience pays off.
Upgrade Your Check with a Chain Wear Tool
Tools like the Park Tool CC-3.2 cost under $20. They hook between links for dead-on reads. No ruler fumbling required.
These beat rulers for speed and subtle detection. They spot 0.5% stretch early. Ideal for frequent riders or bike shops.
How to Use a Wear Tool Correctly
Clean the chain first. Slip the tool into links off the bike.
Most show color zones. Green means good. Yellow warns of wear. Red screams replace. Check tool instructions for exact marks. Some need calibration yearly.
Test multiple spots. It catches issues rulers miss. Pros love the quick snap-in design.
Ruler vs. Wear Tool: Which to Choose
Rulers cost nothing and sit in every drawer. Perfect for beginners or rare checks.
Wear tools shine in precision and portability. Buy one if you log 3,000 miles yearly. Start with a ruler. Upgrade as needed. Both keep you rolling.
Act Fast: Replacing a Stretched Chain
Over the limit? Swap it now. Delays chew your drivetrain. Skipping under load confirms the call, even if borderline.
You’ll need a chain tool and new chain matching your speed: 9-, 10-, or 11-speed. Break the old one at a rivet. Thread the new one through.
Size it right with big-small cog test. Rivet securely. Lube after install. Quick job saves hundreds.
Prevent Future Chain Stretch
Lube every 100 miles. Clean weekly for commuters. Pick quality chains from Shimano or SRAM.
Shift smoothly. Avoid cross-chaining. Keep cadence above 80 rpm. Track miles with a bike app. These habits double chain life.
Regular care beats surprises.

Spotting chain stretch keeps adventures alive. Use a ruler for free home checks or grab a wear tool for pro-level accuracy. Inspect today. Your next ride thanks you.
Share your measurements in the comments. How many miles on your chain? Subscribe for more maintenance tips. Ride safe.
(Word count: 982)