Your gears grind or hesitate mid-ride. That sticky shift ruins the flow, especially after rain or dusty trails. Dry pivot points on front and rear derailleurs cause this mess. They collect grime over time and lose their smooth swing.
Re-lubricating them restores crisp, quiet changes. This DIY fix takes about 30 minutes. No shop visit required. It works for road bikes or mountain rigs. You’ll gather tools, clean rear pivots, lube the rear, repeat for the front, and pick up habits for long-term wins. Smoother rides wait just ahead.
Gather These Simple Tools for Effortless Maintenance
Start with the right gear. You avoid frustration that way. A bike repair stand helps most. Or flip the bike upside down. Pad the saddle with a rag to prevent scratches.
Pick a bike-specific degreaser. Citrus-based formulas cut grime best. They won’t harm metal parts. Grab lint-free rags or paper towels next. These leave no fuzz behind.
Choose light-duty lubricant. Tri-Flow or Finish Line Dry Lube shine here. Skip WD-40. It dries sticky. Avoid thick grease too. It pulls in dirt. An old toothbrush or nylon brush scrubs tight spots. Nitrile gloves keep your hands clean. Add 3mm or 4mm Allen keys. You might tweak adjustments.
One small bottle of each fluid does plenty. Why these? Degreaser dissolves old gunk fast. Light lube lets pivots swing free. It resists dust buildup. Safety first: gloves stop skin irritation from solvents.
In 2026, dry lubes like ceramic blends gain fans. They handle wet conditions well. Test one on a small spot first. Now you stand ready. Everything at hand cuts downtime.
Clean Rear Derailleur Pivots to Remove Years of Buildup
Clean before you lube. Otherwise, fresh oil traps dirt. That speeds wear. Focus on the rear first. It faces more mud and chain slap. Follow steps to avoid over-spray on the chain or cassette.
Secure Your Bike and Shift for Access
Put the bike on a stand. Or turn it upside down safely. Drape a rag over the saddle and bars. This protects finishes.
Shift the chain to the smallest rear cog. Move it to the smallest front chainring too. Pivots show clearest now. Spot the key ones: the B-pivot up top, the P-pivot on the main parallelogram, and the lower guide pulley pivot. They swing the cage side to side.
Picture the derailleur as a metal arm. Joints need freedom to flex. Access lets you hit every angle.
Degrease Every Crevice Thoroughly
Spray degreaser on each pivot. Let it sit one to two minutes. Grime softens up.
Scrub gently with the brush. Hit joints where parts meet and move. Work the B-screw area. Brush the parallelogram links. Clean pulley bolts too. Skip cable housing. Solvent can swell it.
Most degreasers rinse off with water if needed. Many work rinse-free though. Shake excess off. Dirt falls away easy now.
Wipe Dry for a Fresh Start
Grab clean rags. Wipe all solvent and grit. Go over every spot twice.
Spin the derailleur by hand. Check for smooth swing. Dry any wet areas fully. No residue left. Wet pivots push away new lube. You want a bare metal base.
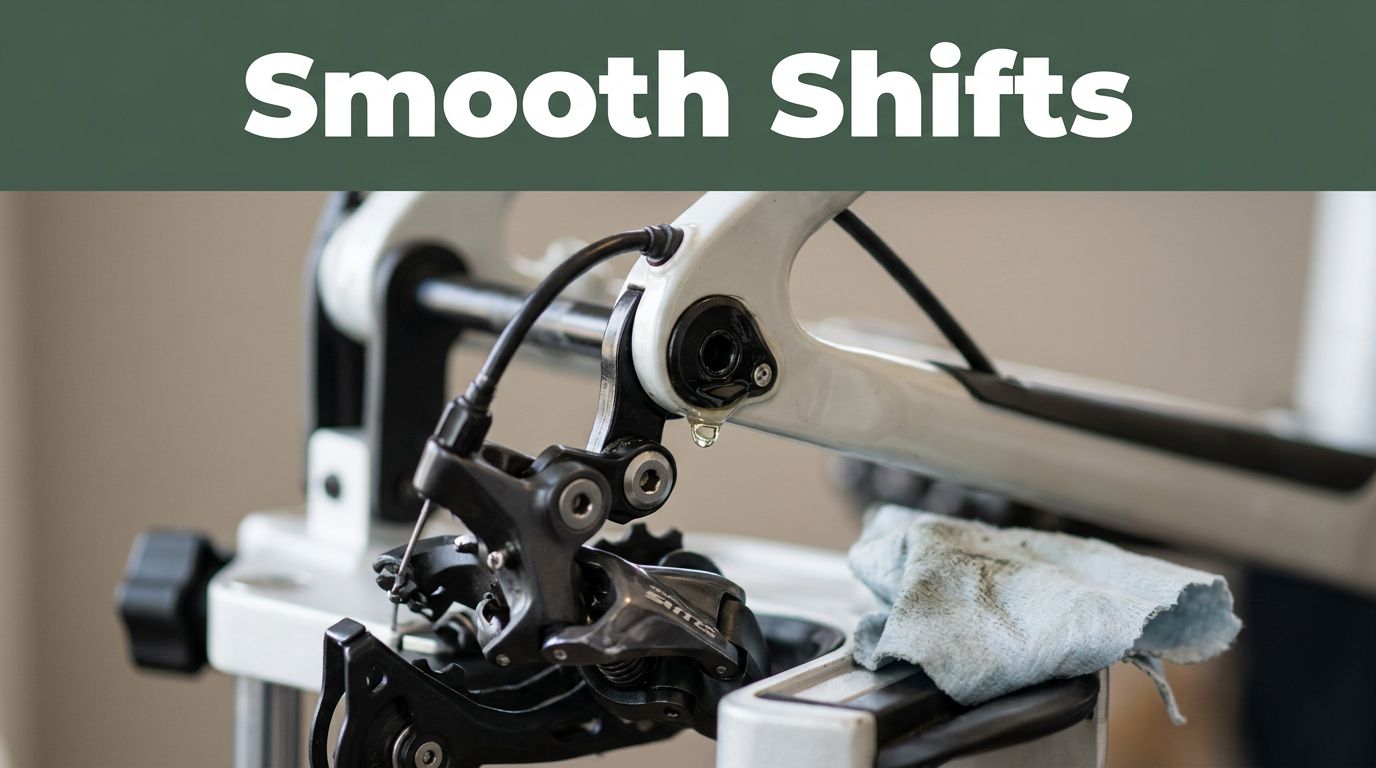
Lube Rear Derailleur Pivots for Crisp Gear Changes
Pivots gleam clean now. Time for lube. Small amounts prevent mess. Dirt skips over thin films. Confidence builds with these steps.
Drip Lube Right on the Pivot Points
Tip the bottle. Add one or two drops per pivot. Hit the B-pivot area first. Then parallelogram joints. Finish with pulley pivots.
Let capillary action pull it in. No pools form. Flooding draws dust fast. Work top to bottom. Gravity helps spread.
Work It In by Cycling Through Gears
Pedal backward slowly. Shift through all rear cogs three to five times. Lube coats evenly.
Listen close. Shifts quiet down. Feel less drag by hand. The cage swings free. Resistance fades.
Buff Away Excess to Stay Clean
Wipe visible lube with a fresh rag. Spin pulleys. Flex the cage.
Check for shine without globs. Let it sit five minutes. Lube sets in. Rear shifts crisp already.
Apply the Same Process to Front Derailleur Pivots
Front derailleurs mirror the rear. But they have fewer pivots. Space stays tighter. Grime builds less here. Reuse your tools. Highlight differences to save words.
Shift to the largest chainring. Move chain to biggest rear cog. Slack lets pivots open.
Position Chain and Reveal Front Pivots
Chain pulls away now. Pivots stand out. Note the main body pivot. Spot the parallel link pivot. Find the cage joint.
These swing the cage in and out. Access beats the rear’s clutter.
Degrease, Lube, and Work the Front Pivots
Fronts run cleaner often. Spray degreaser light if dirty. Scrub quick. Wipe dry.
Add one drop lube per pivot. Shift front rings several times. Pedal to spread. Smooth action returns fast.
Wipe and Quick Test Shift
Buff excess away. Pedal gently. Test front shifts.
Cage clicks over without rub. No hesitation shows. Both derailleurs sync now.
Test Rides and Smart Habits for Lasting Results
Take a short test ride. Stick to flats first. Shift through all combos. Gears snap clean.
Check for rub or noise. All good? You’re set.
Lube pivots every three to six months. Or after wet rides. Store the bike dry. Quality lube lasts longer.
Inspect cables too. Frayed ones bind shifts. If sticky persists, check limit screws. Or hanger alignment.
Build this into your routine. Rides improve. Bike life extends. What’s your worst shifting glitch? Share below.
Clean pivots and fresh lube revive shifts like new. You skip shop bills. Grab tools today. Get weekend-ready.
Try it soon. Share before-and-after in comments. Subscribe for more hacks. Happy pedaling. Gears obey every twist.