Picture this: Alex pedaled hard down a rocky trail last summer. A tiny white line caught his eye on the chainstay. He stopped, checked it out, and took the bike to a shop. Turns out, that hairline crack could have snapped mid-ride. Lucky call.
Carbon fiber frames shine because they’re light and stiff. Riders love them for speed and comfort. Yet they hide trouble well. Impacts or flex can start hairline cracks or deep damage. These weaken the frame over time. A sudden failure means crashes, injuries, or pricey replacements.
You can prevent that with basic checks. This guide covers signs to watch, tools you’ll need, a simple routine, and what to do next. Let’s keep your rides safe.
Spot the Subtle Signs of Hairline Cracks and Impact Damage
Carbon frames take a beating from bumps and crashes. Damage hides under the glossy finish. Early spots save you hassle. Look for thin lines or odd marks, especially after rough outings.
Common spots include chainstays and bottom brackets. These areas flex most. Cracks start small, like a spiderweb on a window. Impacts leave bruises you can’t always see right away.
Riders often miss them at first glance. That’s why pros check often. Next, we’ll break down each type.
Hairline Cracks: The Sneaky Starters of Big Problems
Hairline cracks show as fine white lines under the clear coat. Fibers poke out sometimes. They form from repeated flex over potholes or poor assembly torque.
Start small near welds or high-stress zones. Then they grow. A tiny split turns into a full break if you ignore it. Check after every big ride or fall.
Shine a light across the surface. Shadows pop the lines. Feel gently with a glove. Rough texture signals trouble. Most appear on down tubes or seatstays from pedaling force.
Catch them early. Your frame stays strong longer.
Impact Damage: Dents and Chips That Weaken Your Ride
Impacts crush inner layers even if the outside looks fine. Watch for gel coat chips, small dents, or color shifts. Rock hits cause starburst patterns around the point.
These differ from scratches. Scratches stay surface-level. Impacts compress fibers below, leading to delamination. Paint bubbles mean air trapped inside.
Chainstays take hits from pedals or curbs. Fork legs catch road debris. A bruise-like mark warns of weakness. Press lightly; soft spots flex wrong.
Ignore these, and cracks follow. Inspect post-crash always.
Gather These Must-Have Tools for a Pro-Level Check
You don’t need a shop setup. Basic items do 90% of the work. Grab them for under $20 total.
A bright LED flashlight casts sharp shadows in cracks. Angle it low for best results. Pick one with adjustable focus.
Get a 10x magnifying loupe or glass. It reveals tiny fibers or lines the eye misses. Cheap ones from hardware stores work fine.
Isopropyl alcohol and soft cloths clean grime first. Dirt hides flaws. Use a coin for tapping later.
Wear gloves to avoid oils on the frame. Set up in your garage with overhead light. Lay the bike on a stand if you have one. Otherwise, flip it upside down.
Prep takes minutes. Now dive into the checks.
Follow This Easy Step-by-Step Inspection Routine
Routine checks build habit. Aim for 15-30 minutes monthly. Clean first with mild soap and water. Dry thoroughly. Then inspect systematically.
Start at the head tube. Move clockwise: down tube, bottom bracket, chainstays, seatstays, fork. Rotate the bike for every angle. Take photos for records.
Combine looks with tests. Mark suspects with tape. Stay calm; most frames pass fine.
Light It Up and Look Close for Hidden Flaws
Hold the flashlight at 45 degrees. Sweep slowly across surfaces. Cracks cast shadows like cracks in dry mud.
Grab the magnifier for odd spots. Check glossy and matte finishes the same. Clean residue often fools you.
Look for gel coat crazing, fine networks of lines. Rotate the frame. Miss nothing in low light.
This step catches 80% of issues. Take your time.

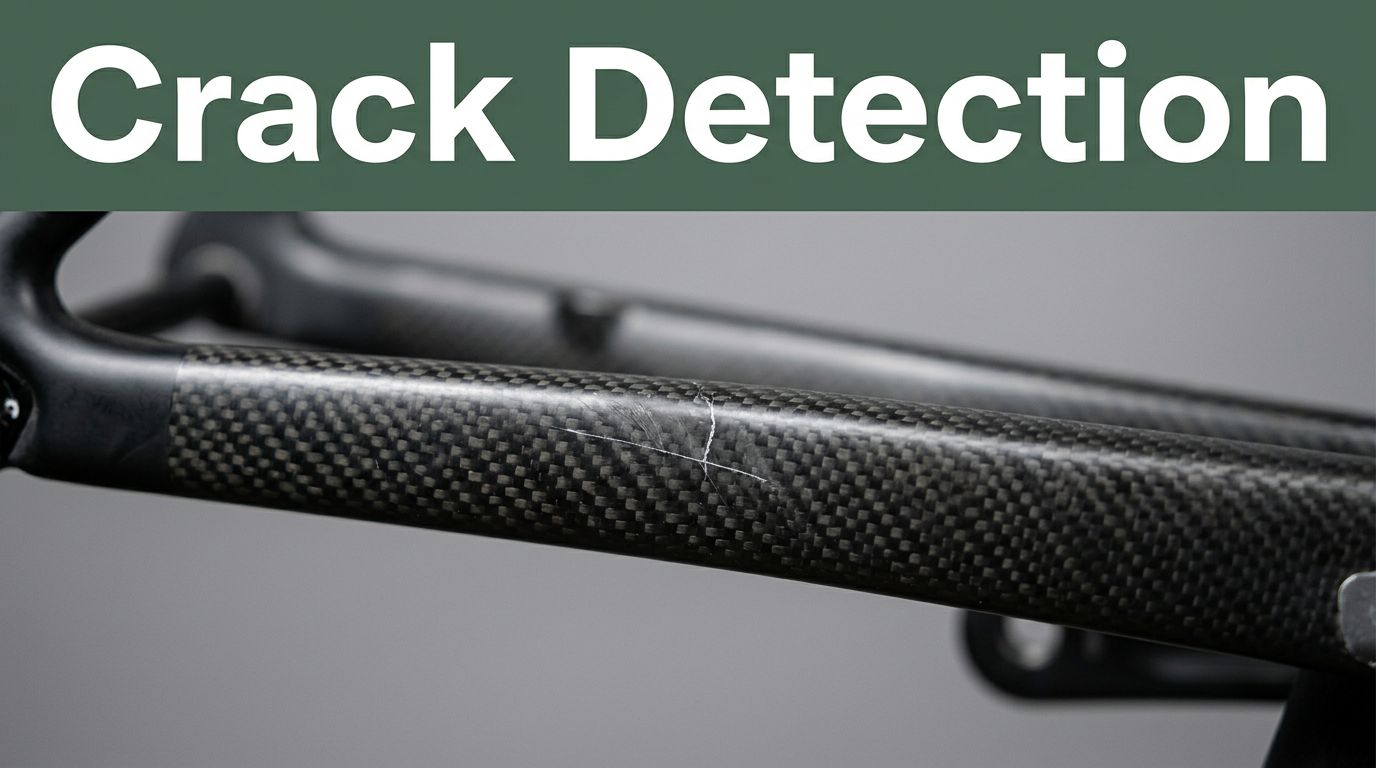
Image shows light revealing a hairline crack shadow during a routine check.
Tap Test: Listen for the Sound of Trouble
Tap gently with a coin or plastic scraper. Start at the head tube, end at dropouts. Healthy carbon rings with a high-pitched ping.
Damaged areas thud dull. Delamination deadens the sound. Practice on a known good bike first.
Tap in a grid pattern. Cover seams and flats. Mark low spots immediately.
Listen close. Sound tells what eyes miss.
Focus on High-Risk Zones Like a Seasoned Mechanic
Bottom brackets crack from chainring stress. Squeeze gently; no weird flex.
Dropouts take wheel hits. Check for chips or thuds. Fork lowers hit debris often. Paint chips near pedals signal pedal strikes.
High-risk zones fail first. Give them extra time.
Handle Suspected Damage: Repair Options and When to Stop Riding
Find a crack over 1cm? Stop riding now. Deep impacts or widespread thuds mean pro help.
Cosmetics only for DIY. Structural fixes need experts. Prevention beats repair: dodge curbs, check after falls.
Know when to act. Safety first.
DIY Fixes for Minor Issues vs Calling in Experts
Clean small chips with alcohol. Apply thin epoxy, sand smooth. Works for surface dings only. Never on load spots.
Call pros for chainstay cracks or fork damage. Repairs run $100-500. New frames top $1000.
Shops use heat presses for delam. Test post-fix. Ride safe.
Regular Checks Keep You Rolling Strong
Spot signs like white lines or dull thuds. Gather simple tools. Run the routine monthly. Act fast on damage.
Peace of mind comes from knowing your frame holds. Most last years with care.
Share your inspection finds in the comments. Bookmark this for next time. Ride on.
(Word count: 982)