Picture this. You slap on fresh disc brake pads. You hit the road feeling confident. But the brakes feel mushy. Stops take longer than before. That driver was you last time. Proper bedding fixed it fast.
Bedding in means a quick process. You heat the pads and rotors together. This transfers pad material evenly onto the rotors. You get maximum friction right away. Skip it, and you risk uneven wear. Brakes might squeal or vibrate. Worst case, stopping power stays weak.
Do it right, though. You shorten stops. Rides stay quiet. Pads last longer. This guide covers prep work, exact steps, and pitfalls. You’ll handle it safely at home. Let’s build those brakes for peak power.
Why Bedding In Delivers the Best Braking Performance
New pads start smooth. They need heat to work right. During bedding, you create stops from speed. Friction builds heat. Pad material transfers to the rotor surface. This forms a thin, even layer.
Think of it like seasoning a cast-iron pan. First use leaves residue. Heat sets it in place. Now food doesn’t stick. Brakes work the same. That layer grips better. Stops feel firm and consistent.
Poor bedding causes trouble. Glazing happens if you overheat without cools. Rotors shine but don’t grab. Fading sets in too. Brakes weaken under heat. Good bedding avoids this. You get steady power every time.
Safety numbers back it up. Tests show proper bedding cuts stopping distance by 20 to 30 percent. From 60 mph, that’s feet that matter. It works for cars and bikes. Manufacturers tweak steps a bit. But the core process stays similar across vehicles.
Benefits stack up. First, shorter stops save lives. Second, less noise means peaceful drives. Third, even wear extends pad life. Fourth, rotors stay flat, no warping. Do this after every pad change. Your brakes reward you.
Signs Your Brakes Need Bedding After a Pad Swap
Fresh pads often squeal at first. That’s material not settled yet. Long stops signal uneven friction. Pedal feels soft or mushy. Heat builds unevenly.
Smoke or a burning smell appears too. Pads release gases during break-in. These point to skipped bedding. Act quick. Weak brakes risk accidents. Check them before daily drives.
Prep Your Ride: Tools, Checks, and Safety Must-Dos
Start with the right gear. Grab a jack and sturdy stands. Add a lug wrench for wheels. Wear gloves and eye protection. A torque wrench helps for reassembly, but it’s optional.
Inspect before you drive. Look at rotors for deep grooves or cracks. Replace if damaged. Ensure pads sit flush in calipers. Check brake fluid levels. Top off if low. Inflate tires to spec.
Safety comes first. Pick a quiet spot. Heat builds fast, so watch for fire risk. Keep a fire extinguisher handy. Never bed on busy roads.
Quick Brake System Inspection Checklist
Follow these steps in order.
- Jack up the car. Secure with stands.
- Spin wheels by hand. Feel for drag.
- Check calipers slide free.
- Look for fluid leaks around lines.
- Release parking brake fully.
- Test cold brakes on a short drive.
All good? Proceed. Issues mean fix first.
Best Locations for Your Bed-In Drive
Head to an empty industrial park. Straight, wide lots work best. Early mornings cut traffic. Or use quiet back roads.
Skip highways. No wet weather either. Dry pavement grips true. Rain contaminates the layer. Plan 20 to 30 minutes total.

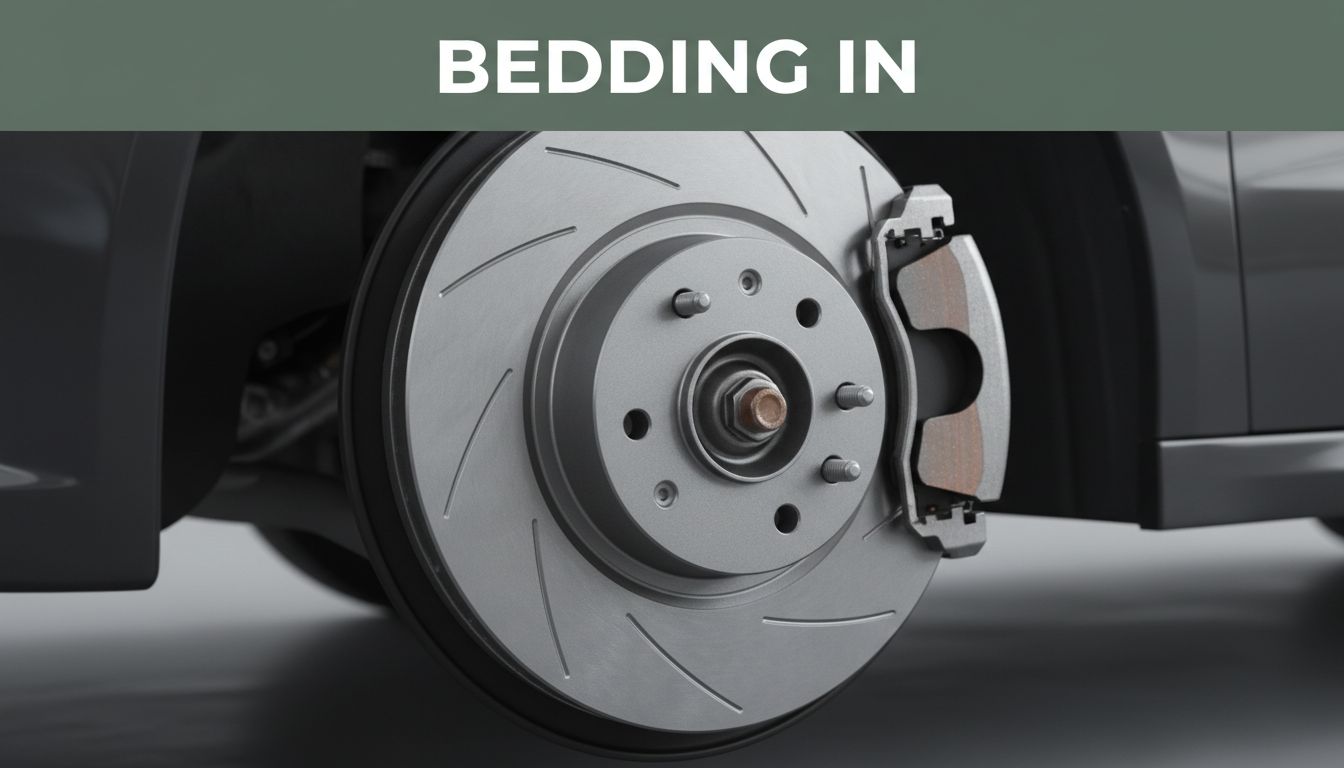
This image shows a shiny glazed rotor next to a properly bedded one with even transfer layer.
Step-by-Step Guide to Bed Your Brake Pads Right
Now the fun part. Follow this sequence exactly. It builds the friction layer step by step. Total time runs 20 to 30 minutes. Repeat cycles if brakes still feel off.
Drive to your spot. Start engine. Buckle up. Begin with gentle acceleration between stops.
- Make 8 to 10 moderate stops. Go from 35 to 40 mph down to 10 mph. Use firm pedal pressure. Avoid full lockup or ABS kicks in.
- Between stops, drive slowly. Let heat drop a bit. Cover about a half mile each time.
- Next, do 3 to 5 hard stops. Accelerate to 60 mph. Brake firm to 20 mph. Control the skid.
- Intersperse cool drives. Go easy for 2 miles after hards.
- Park after cycles. Let brakes cool fully. Wait at least one hour.
Smell hits normal. Light smoke fades quick. Stop if it worsens. For bikes, adjust speeds down. Use same heat cycles.
Warm-Up Stops: Build Heat Gradually
These first stops matter most. Hit 40 mph. Brake moderate to 10. Repeat 10 times.
Heat rises steady. Material starts transferring. No rush here. Patience prevents glazing. You’ll feel pedal firm up by stop five.
Hard Stops: Ramp Up the Friction Layer
Shift to 60 mph runs. Brake hard but smooth to 20. Do five.
Friction peaks now. Layer thickens even. Tires might chirp. That’s fine. Control keeps it uniform.
Cool Down and Final Test Drive
Drive gently 5 to 10 miles. No hard brakes. Test normal stops after.
Power feels smooth. Pedal stays solid. You’re set for regular use.
Steer Clear of These Bedding Pitfalls
Too many hard stops early warps rotors. Heat shocks metal. Start moderate always.
ABS lockup creates uneven spots. Brake just before it grabs. Smooth pressure wins.
Wet roads wash away material. Wait for dry. Contamination ruins the layer.
Skipping cools leads to glaze. Metal overheats. Always drive easy between.
Follow pad maker notes. They know their formula. Stop if brakes pull or grind.
What If Something Goes Wrong During Bedding
Grinding means metal on metal. Pull over. Inspect pads.
Pulling to one side? Check calipers stuck. Heavy smoke? Abort. Let cool. Retry or call a pro.
Fix minor issues. Retry cycles. Safety trumps speed.
Proper bedding transforms your brakes. You start with moderate warm-ups. Add hard stops. Cool fully. Avoid early pitfalls like lockups or wet pavement.
Safety stays number one. Weak brakes don’t forgive mistakes. Practice this once. It sticks for life.
Share your bedding story in comments. Did it cut your stops? Subscribe for more car tips. Bedded brakes mean confident drives. You got this.